3 Simple Fixes That Dramatically Improve Your Sonos Soundbar
TL;DR — Center the soundbar at eye level, boost the height/Atmos output a little, and run TruePlay calibration (re-run after moving furniture). If you still want more immersion, add rear speakers and a Sub.
Why most soundbars sound “polite” instead of cinematic
Buying a Sonos soundbar and expecting theatre-level sound is a common mismatch. The difference usually isn’t that the hardware is weak—it’s that room layout, placement, and tuning govern what you actually hear. Put a great soundbar in a cabinet or off to one side and reflections, absorption and blocked drivers erase the sense of space. The fix is mostly practical: better placement, a few app toggles, and a quick calibration.
Real-world room layout and furniture affect soundbar output more than marketing specs.
Quick 3-step checklist (do these first)
- Placement: center the bar, keep it near eye level, and don’t enclose it.
- Height/Atmos: open the Sonos app and boost the height-channel/Atmos output in small steps.
- Calibration & dialogue: run TruePlay, enable Speech Enhancement, disable Loudness, and tweak EQ.
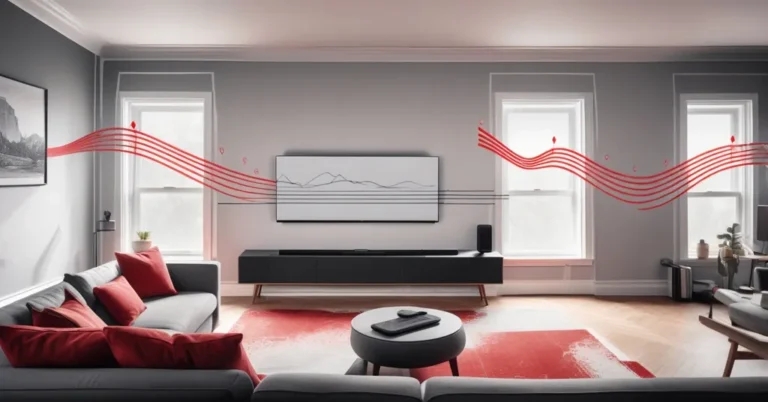
Step 1 — Placement: the 3-minute check that changes everything
Sound interacts with walls, furniture and objects. Try this quick routine:
- Move the bar so it’s centered under the TV and roughly at eye level when seated.
- Don’t hide it inside a cabinet or directly behind big decor; give the upfiring drivers room (if the model has them) to reflect off the ceiling.
- Listen with familiar dialogue-heavy content and note whether voices feel “in front” or muffled.
“Upfiring drivers” are simply speakers that point upward to reflect sound off the ceiling and mimic overhead channels for Dolby Atmos. They work best when the ceiling is a normal height and there’s free space above the bar—vaulted ceilings, very low ceilings or tight shelving reduce their effectiveness.
Upfiring speakers simulate ceiling channels, but they need space and room geometry to create convincing height.
Quick anecdote: moving an Arc out from a closed shelf and re-running TruePlay made dialogue intelligible and noticeably widened the sense of space—an easy 10-minute win.
Step 2 — Dolby Atmos tips: boost the height channel (safely)
If Atmos sounds flat, open the Sonos app, select your soundbar, and look for the height/Atmos level control in the audio settings. Boost in small steps—try +2 dB, then +4 dB—until the overhead cues feel more present without sounding harsh. Stop if the sound becomes tinny or forwards feel displaced.
When to add hardware:
- If you want believable verticality, add rear speakers or dedicated ceiling speakers. An Era 300 used as surrounds can help because it includes an upfiring tweeter that contributes to height.
- Beam (Gen 2) and Ray improve TV sound but don’t have dedicated upfiring drivers, so they won’t produce strong Atmos height on their own.
Remember: physical channels (rear/ceiling speakers) still outperform simulations in challenging rooms. If you manage multiple rooms for guests or offices, plan physical speaker placement into the install spec rather than relying solely on upfiring tricks.
Step 3 — Calibration, Speech Enhancement and EQ for clearer dialogue
Start with TruePlay calibration from the Sonos app. TruePlay listens to how your room responds and adjusts the sound accordingly—re-run it after you move furniture, change speaker positions, or refinish floors. If your device isn’t compatible, check Sonos support for current requirements.
Toggle these Sonos features:
- Speech Enhancement: turns up mids and reduces masking bass so voices cut through.
- Night Sound: compresses dynamic range for late-night listening and can help dialogue without blasting volume.
- Loudness: turn this off if active—its bass boost often buries speech.
Simple EQ starting points (use as rough guides):
- If voices are muffled, reduce bass around 80–120 Hz by 2–4 dB.
- For vocal presence, try a modest boost of 1–2 dB in the 1–3 kHz band.
- When adjusting, change one band at a time and listen for 30–60 seconds of familiar content.
When to add a Sub and/or rear speakers
Adding a Sub (Sonos Sub) lets the bar hand off low frequencies so it can focus on mids and dialogue—this often clears up muddiness. Rear speakers widen the horizontal sense of space and give better separation for effects in films.
- Budget vs. impact: a Sub gives the biggest bump in perceived fullness; rears help immersion and directional cues. If you can afford only one add-on, pick the Sub for balanced improvement.
- Private listening: Sonos Ace headphones can mirror your system and deliver the tuned sound without disturbing others.
Quick troubleshooting FAQ
- Why does my Sonos soundbar still bury dialogue?
Check that Loudness is off, enable Speech Enhancement, reduce bass in EQ, and consider adding a Sub so the bar can prioritize mids. Re-run TruePlay after any room changes.
- Where is the height/Atmos control in the Sonos app?
Open the Sonos app, select the soundbar, then look in the sound or advanced audio settings for a height or Atmos level slider. Increase in small steps (+2 to +6 dB) and test with Atmos content.
- How often should I re-run TruePlay?
Re-run after moving furniture, changing speaker positions, replacing carpets, or major layout changes. If the room is static, once every few months or after firmware updates is reasonable.
- Beam or Ray vs. Arc—what should I expect?
Beam Gen 2 and Ray improve TV audio dramatically compared with TV speakers, but they lack dedicated upfiring drivers—don’t expect strong Atmos height from them without extra speakers.
For AV teams and businesses: scale with standards, not guesswork
When deploying Sonos across hotels, meeting rooms or retail spaces, standardize placement and run a calibrated TruePlay profile per room type. That reduces rework, guest complaints and inconsistent audio experiences. Software fixes scale well for predictable rooms, but allocate budget for physical channel installs where uniform immersion matters (e.g., premium suites or flagship meeting rooms).
Pro tools, next steps and a short roadmap
If you want to go deeper, use SPL meters, REW (Room EQ Wizard), or hire a pro for full-room measurement and speaker alignment. For most homes, the three fixes above produce the best ROI: better placement, a height boost where relevant, and smart calibration.
More broadly, expect audio systems to lean on smarter tuning and machine learning. Today’s features—TruePlay, Speech Enhancement and dynamic EQ—are early steps. Tomorrow, you’ll likely see systems that automatically detect content type, room geometry and listener position and adapt in real time.
Try this now: center your bar, open the Sonos app and check Speech Enhancement and Loudness, run TruePlay, then play a dialogue-heavy scene. If you want deeper immersion, add a Sub and rears. Small adjustments, big returns.
Turn on Speech Enhancement (and Night Sound if needed) and turn off Loudness to make dialogue more intelligible.